Written By: Audrey Jackson
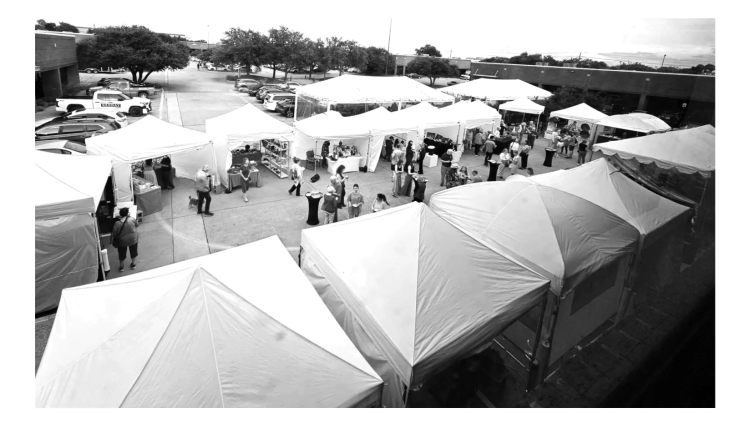
Image via Craftguild.org
For working artists and makers who sell at craft shows and pop-up markets, a vendor show can feel like equal parts opportunity and stress. Slow foot traffic, awkward pricing questions, last-minute booth hiccups, and the pressure to “look busy” can leave independent creators wondering whether the work is worth it. Even when the products are strong, vendor show challenges can blur what’s actually happening at the table and make craft fair essentials feel confusing or inconsistent. With the right expectations and a clearer approach, selling at craft shows can feel steadier and more profitable.
Craft Show Sales Boosters
- Plan booth presentations to look inviting and help shoppers understand your products quickly.
- Set pricing with clear awareness so customers feel confident buying on the spot.
- Engage customers proactively with friendly, helpful conversation that supports easy decision-making.
- Focus on practical vendor techniques that improve visibility and help you stand out at shows.
Build a Logo That Makes Your Booth Instantly Recognizable
Those quick sales-boosting moves land even better when shoppers can instantly tell it’s your booth. A well-designed logo helps you make a strong first impression, build brand awareness, and stand out from other vendors selling in the same aisle. When your logo is consistent across your booth signage, packaging, and social handles, people remember what they saw, and can find you again later.
If paying for a designer isn’t in the cards right now, you can create something polished yourself with an online logo generator. Start by picking a style and an icon that fits what you make, then add the text you’ll need (like your business name). You’ll be able to preview a range of logo options and fine-tune the look by adjusting fonts and colors until it feels like a natural match for your brand. Once your logo is set, you’re ready to prep the rest of your show setup and sales flow step-by-step in the next section.
Set Up a Craft Show Sales Plan From Start to Finish
This step-by-step setup helps you pick the right events, build a display that stops shoppers, price and package products clearly, stay on top of stock, and accept payments fast so you do not lose momentum.
1. Choose the right shows for your products start by listing 5 to 10 events and compare who attends, what similar vendors sell, booth fees, and expected traffic. Aim for shows where your price range feels normal and your products solve an obvious gift or everyday need. Confirm rules early so your display, signage, and payment setup fit what the organizer allows.
2. Design your display to attract and guide buyers
3. Build your table like a mini storefront with clear height, neat groupings, and easy-to-read price signs. A key reason to focus here is that 74% of attendees say they are more likely to buy from exhibitors with visually engaging displays. Do a quick walk-by test from 10 feet away and remove anything that looks cluttered.
4. Set simple pricing methods and build in profit. Choose a pricing approach you can explain in one sentence such as good, better, best bundles or a clear price ladder across sizes. Add your costs, your time, and fees so you are not undercutting yourself, then round to shopper-friendly numbers. Put prices on products or bins so people can decide without having to ask.
5. Upgrade packaging and tighten inventory control. Pick packaging that protects the item, shows your brand, and makes gifts easy such as tissues, a sticker seal, and a thank-you card with care instructions. Then track stock with a small checklist and a running count so you know what to restock and what to feature. Using a craft show planner helps you keep tasks, supplies, and reorder notes in one place.
6. Choose payment options that keep the line moving. Offer at least two ways to pay, typically tap or chip card plus a backup option, and test everything before you leave home. Make signage that says what you accept and set up your checkout spot so you can bag items, hand receipts, and move to the next shopper quickly. Never turn a customer away becomes much easier when you accommodate different payment preferences.
Final Show Prep Checklist That Prevents Surprises
This quick list helps you catch small gaps before they cost you sales. Use it the night before and again during setup so your booth runs smoothly from first browse to final checkout.
- Confirm event rules, arrival time, and load-in route
- Pack a labeled kit of tools, tape, cords, and backups
- Set clear prices on every item, bin, and bundle sign
- Arrange products by category, height, and bestsellers at eye level
- Verify inventory counts and pre-stage fast-moving refills
- Test card reader, phone hotspot, and offline payment mode
- Set a tidy checkout zone with bags, receipts, and change
- Check these off, take a breath, and focus on connecting with shoppers.
Turn Each Craft Show Into Stronger Sales Momentum
Craft and vendor shows can feel like a lot to juggle, setup, pricing, people, and the pressure to make the day “worth it.” The steady answer is the approach that runs through strong events: prepare with intention, show up with clarity, and use craft show reflections to keep improving instead of guessing. When that mindset leads, vendor confidence rises, sales feel more predictable, and artistic entrepreneurship becomes a skill you build through growth through shows and community support for makers. Every show is data, practice, and relationships, not just a sales day.

